bhyve, zvol, zfs, and importing zpool from host

I’ve been having problem with importing zpool of a vm which was using a zvol as its disk image.

I don’t know the exact detail but the only way I can import it so far is by dd-ing the image to a file and then attaching it as md device as such:

# mdconfig -a -S 512 -f /mnt/vm/somevm/disk0.img
md0

And then the pool can be normally imported from the md0 device.

Of course, had the vm been created as image file on zfs filesystem, the dd step can be skipped and just md the file right away.

Conclusion?

Just use plain image file for vm disk. Either that or use ufs for the vm filesystem instead (ew).

Other benefit of using image file includes less noisy gpart output.

Building Ruby 3.2 on FreeBSD

An update from the one I wrote years ago. That one overrides entire CFLAGS and thus missing -O3 and all those good optimization stuff.

In short, do this first:

export cflags="-I/usr/local/include"
export LDFLAGS="-L/usr/local/lib"

And then build as usual: ./configure --prefix=... && make ....

I usually put that block of config in a script called _build:

#!/bin/sh

<the export lines above>

exec "$@"

To use it just prefix the build commands with it: _build ./configure ... && _build ....

Windows 8 Login Profile Image

For some reason my new Windows install isn’t displaying my profile image on login screen.

After many hours of digging it turned out the settings app which handles changing profile image doesn’t update the registry correctly. Namely it’s missing Image200. There are entries for other size but for some reason this install doesn’t set that specific one.

I’m not sure what caused it but for now adding the entry manually fixes it.

The entry is located at:

HKEY_LOCAL_MACHINE\SOFTWARE\Microsoft\Windows\CurrentVersion\AccountPicture\Users\{USER-SID}

I also had to takeover ownership of the key.

Edit: WAIT NEVERMIND. My other install (which I used as reference) turned to also show exactly same problem. And so does my laptop with latest updates. There’s only one system which doesn’t have the problem but I haven’t updated it recently so it’s most likely broken by one of the recent updates.

IPoE, but static IPv4

Continuing from previous post, at the end I mentioned about using Vultr to avoid paying extra for static IPv4 address through my ISP.

Well, there has been a different problem with IPv4 connection crapping out every now and then so I ended up getting that ISP static IP option hoping it will lessen the problem. No comment on that yet because it’s only been less than 12 hours since I got it set up.

So, the setup itself, because I’m not using one of the supported routers, I had to figure it out myself.

The ISP provides a few needed information for the setup:

  • Static IP Tunnel Endpoint: an IPv6 address to connect for IPv4 connectivity
  • Interface ID: IPv6 address suffix (last 4 group)
    • FreeBSD doesn’t support it (it’s ip-token in Linux) but it really is just for address suffix. Mine’s ::feed so my expected address is 2409:11:1c0:2300::feed. I have it set as external IP address
  • Static IPv4 Address: this is to be set at tunnel interface as source address.
    • There’s no IPv4 target address provided which is required for FreeBSD’s gif interface but apparently any address works. I put in 10.0.0.0
    • This blog says to use source as target as well but apparently it results in packet being forwarded back and forth indicated by 14ms ping to the source IP
  • “Update Server Details”: I have no clue what this actually does
    • It’s a set of URL, username, and password where you’re supposed to make a request to to update… something. The form is simple, just $URL?username=$USERNAME&password=$PASSWORD. The URL uses internal domain so the DNS server from IPv6 autoconfiguration is required to resolve it
    • I just hit it with curl and the move on
    • I suspect it’s to tell the tunnel provider the expected source IPv6 address?

Geared with information above, there are a few changes needed since last post for setup on FreeBSD:

  • IP address on internet port should be suffixed with provided interface ID
  • Tunnel source and target address need to be adjusted
  • Tunnel interface need IPv4 address
  • Default routing for IPv4 is no longer on interface level (-iface gif) but instead the random IPv4 address used as tunnel target address (10.0.0.0 in my example above)
  • NAT is not automatically available anymore so PF is required
  • Also on NAT, MSS will need to be fixed as well
    • I still don’t really understand how this works

Most of the changes should be obvious. And here’s the config for PF:

# This is pf.conf for FreeBSD and won't work on OpenBSD

# variable to not hardcode interface names and stuff
ext_if = gif0
net_local = "192.168.0.0/24"

# I still don't know if this is needed. Or even what the correct value is.
scrub on $ext_if max-mss 1420

# basic nat
nat on $ext_if from $net_local -> ($ext_if)

IPoE, FreeBSD, and Realtek

Update: made it work again with Realtek (see update at the end).

Also: DS-Lite, Japanese ISP, ND proxy, and static IPv6.

After upgrading my server to FreeBSD 13, my ethernet failed to obtain autoconfigured IPv6 address which was weird. It’s been kinda weird before occasionally not receiving address manually after reboot but at least it works if I let it autoconfigure during boot.

Thanks to the fact the IPv6 works pretty much plug and play and usable on multiple systems just with switch, I booted up another FreeBSD 13 system hoping to find out if it’s some broken configuration on FreeBSD 13 on the server or something else.

The result was test system got its IPv6 autoconfigured, even manually with rtsol. Also weird was the main server got its address autoconfigured as well.

While at it, I wondered if I can just use static IP so the overall configuration can be simplified. And the answer was yes: it just works as long I enter the detail manually. I’ve been entering them mostly manually anyway so this was good news.

Good news it was, until I tried it on the main server itself: it worked when the modem and server are bridged by another switch but not when connected directly. It just didn’t work. Swapping back to the switch made it work again.

Back to testing, I tried direct connection to test server, and interestingly enough it worked right away. It also survived reboot, disconnect/reconnect, reconfiguration, etc.

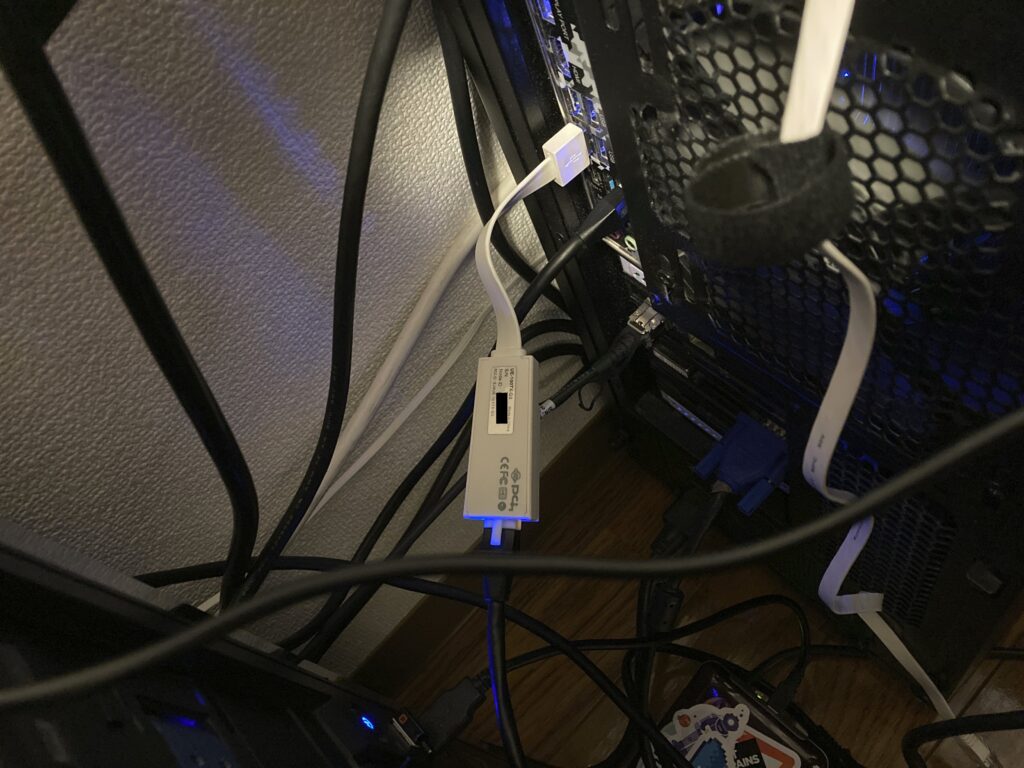
At that point I pointed down it to the possibility of Fast Ethernet mode (100Base-TX) of Realtek just being weird and whipped out my old trusty USB ethernet dongle. And it just worked. Good job, Realtek.

So, yeah, something is broken with Realtek but I don’t care enough to dig deeper so dongle life it is.

As an extra, here’s my configuration, complete with ND proxy so the main server can distribute IPv6 address to other clients at home without having to bridge the modem directly (which gives horrible result of unwanted DNS suffix especially on Windows).

ISP is Interlink and using DS-Lite tunnel (“Multifeed” for this ISP) for IPv4 access.

### BEGIN /etc/rc.conf
# ue0 = internet port (connected to modem)
# em0 = internal port (connected to home switch)

# Basic static IPv6 configuration
ifconfig_ue0=up
# promisc option is probably set by ndproxy and not needed to be explicitly set here but I haven't tested it
# prefixlen 128 so no routing added for this port while keeping the requirement for internet port
# the address prefix and default route can be obtained when using autoconfiguration
ifconfig_ue0_ipv6="inet6 2409:11:1c0:2300:: prefixlen 128 promisc"
ipv6_defaultrouter="fe80::21e:13ff:fec2:e9c5%ue0"

# DS-Lite tunnel
cloned_interfaces=gif0
# target address can be obtained by searching the internet (multifeed) or just ISP documentation
# MTU is from experiment: raise MTU and ping around until it times out (and then add 28 bytes header)
# example: ping -s 1432 -D answers.microsoft.com
# and then try 1434 (with MTU 1500)
ifconfig_gif0="inet6 tunnel 2409:11:1c0:2300:: 2404:8e00::feed:100 prefixlen 128 mtu 1460"
defaultrouter="-iface gif0"

# nd proxy. Don't forget to install the package first: pkg install ndproxy
ndproxy_enable=yes
# interface that connects to the uplink (internet)
ndproxy_uplink_interface=ue0
# mac address of the interface above. Or maybe random address could also work. Not sure
ndproxy_downlink_mac_address="00:22:cf:xx:xx:xx"
# same as defaultrouter above but without interface name
ndproxy_uplink_ipv6_addresses="fe80::21e:13ff:fec2:e9c5"

# internal connection (with local IPv4 for NAT)
ifconfig_em0="10.0.0.1/24"
# same prefix as external interface but prefix 64
ifconfig_em0_ipv6="inet6 2409:11:1c0:2300::1 prefixlen 64 -accept_rtadv"

# for distributing ipv6 addresses. No configuration needed
rtadvd_enable=yes
rtadvd_interfaces=em0

# not sure which of the following are actually needed
ipv6_activate_all_interfaces=yes
# pretty sure at least corresponding forwarding sysctl are needed to be set if those two lines are not enabled
ipv6_gateway_enable=yes
gateway_enable=yes

### END /etc/rc.conf

Interestingly NAT doesn’t need to be manually configured: the DS-Lite tunnel magically handles it. I also keep forgetting about this and confused by the lack of NAT setting in my pf.conf.

Note that the outgoing address 2409:11:1c0:2300:: isn’t reachable from internal network with this configuration. Use 2409:11:1c0:2300::1 instead, including for external access (like this blog).

I should also write up my Wireguard-based external IPv4 one of these days… (because I’m too cheap to pay for Interlink’s static IPv4 – Vultr additional IP for 220yen vs Interlink IPoE static IPv4 for 1100yen).

Update 2021-05-18: I installed Realtek driver (realtek-kmod package) and it works. I previously had to use it as the driver was missing in FreeBSD 12 but switched to the updated built-in driver when upgrading to 13. Tried again with the driver and it works in 13.
DKIM signing with OpenSMTPD and dkimproxy

After a long wait of OpenSMTPD 6.6 and its accompanying rspamd filter, I finally sent my mails DKIM-signed. Along the way I also discovered rspamd does a bit too much for my need and learned that it’s way simpler to use dkimproxy instead.

Outline of the steps required as follow:

  • Install OpenSMTPD
  • Install dkimproxy
  • Create signing keys
  • Decide “selector” name
  • Add relevant DKIM entry to all relevant domains
  • Setup dkimproxy to sign stuff
  • Setup OpenSMTPD to relay to dkimproxy before finally sending the message
  • Test
  • Done

Signing keys are created by:

openssl genrsa -out /etc/mail/dkim/selector1.key 1024

Followed by creating the public key for DNS entry:

openssl rsa -in /etc/mail/dkim/selecto1.key -pubout -out /etc/mail/dkim/selector1.pub

Don’t forget to fix private key permission to 400 owned by whatever user running dkimproxy.

The dkimproxy setting is pretty simple:

listen 127.0.0.1:10027
relay 127.0.0.1:10028
domain domain1.com,domain2.net
signature dkim(a=rsa-sha256c=relaxed)
signature domainkeys(c=nofws)
keyfile /etc/mail/dkim/selector1.key
selector selector1

It’s pretty straightforward.

And equally straightforward the settings for OpenSMTPD:

table aliases file:/etc/mail/aliases

listen on lo0
listen on lo0 port 10028 tag DKIM

action "local" mbox alias <aliases>
action "relay_dkim" relay host smtp://127.0.0.1:10027
action "outbound" relay

match tag DKIM for any action "outbound"
match for local action "local"
match for any action "relay_dkim"

First line sets the aliases.

Followed by a listener on localhost because this is just an example for sending-only server.

The listener on port 10028 is to accept the signed mail by DKIM to be finally sent.

local action sending mails to mbox for local user.

relay_dkim action will send mails to dkimproxy which will sign the email…

And relayed to 10028, accepted by smtpd, tagged DKIM and thus will be finally sent to where it should be. I learned the hard way it needs to come first because mails will be acted on first match.

Local for local. Don’t bother doing anything.

And finally the rest will be relayed to dkimproxy. As mentioned above, this must come after the outbound action for DKIM tagged mails.

If you want to run proper mail server with rspamd and stuff, read this instead. That article was also the reason I started looking into all this DKIM stuff.

Update 2024-07-21: Now with more modern algorithm.

Letsencrypt, cavemen edition

Just had to do some letsencrypt setup in some servers so I figured I should write down what I did so I can just check this page again instead of digging how I did it previously.

Requirements:

  • nginx
  • certbot

This assumes the server only serves https and redirects all http traffic. Adjust as needed otherwise.

Full nginx SSL/TLS config not included.

First add this config to nginx to handle verification:

# part of default port 80 config block
location /.well-known/acme-challenge/ {
    root /var/www/certbot;
}

And then create the directory (I’m not actually sure if needed):

# mkdir -p /var/www/certbot

Make the first cert because I’m too lazy to ensure the config directory is setup correctly:

# certbot certonly --webroot -w /var/www/certbot -d DOMAIN_NAME_GOES_HERE --keep --agree-tos --email SOME_KIND_OF@EMAIL_ADDRESS --no-eff-email

At this step, the certificate and all should have been properly generated.

Then use it in nginx configuration, the relevant server block:

ssl_certificate /etc/letsencrypt/live/DOMAIN_NAME_GOES_HERE/fullchain.pem;
ssl_certificate_key /etc/letsencrypt/live/DOMAIN_NAME_GOES_HERE/privkey.pem;
ssl_trusted_certificate /etc/letsencrypt/live/DOMAIN_NAME_GOES_HERE/chain.pem;

If the full path seems too long, symlink it to nginx config base directory or something.

Update certbot CLI configuration located at /etc/letsencrypt/cli.ini:

rsa-key-size = 4096
text = True
authenticator = webroot
webroot-path = /var/www/certbot

To add more certificates:

# certbot certonly -d ANOTHER_DOMAIN

Don’t forget to update nginx configuration as before.

Since the certificate needs renewal periodically, create this simple script:

#!/bin/sh
# I personally put this in /root/bin/refresh-ssl-certbot

/usr/bin/certbot renew
/path/to/sbin/nginx -s reload

Make executable, etc. Try it to make sure it runs properly.

Then add it crontab. I usually do it weekly.

And done.

There might be smarter way using certbot’s nginx plugin or something but I haven’t bothered reading its documentation and initially this was just a stopgap switching from acme-client which is way simpler but stopped working for me few months ago.

IP address checker

Random idea I came up when reading nginx mailing list. A very simple way to set up external IP address checker using nginx on a remote server.

location = /ip {
    default_type text/plain;
    types { }

    return 200 $remote_addr\n;
}

Accessing /ip will then return the current external IP address. A more fancy output like JSON is possible as well.

Ruby 2.3 on FreeBSD 11

Note: outdated. Check this post instead.

Compiling Ruby on FreeBSD is not quite simple.

  • make sure to tell it to also find libraries in /usr/local
  • and tell configure script to find OpenSSL in /usr because the later version isn’t quite compatible with latest ruby yet

So here’s the configure line

CFLAGS=-I/usr/local/include \
CPPFLAGS=-I/usr/local/include \
LDFLAGS=-L/usr/local/lib \
./configure --prefix="/opt/ruby23" --disable-install-doc --with-openssl-dir=/usr \
&& make \
&& make install

Miura Fold

This is mostly for my own reminder.

  1. Google “miura fold”
  2. Read some articles, watch some videos
  3. Remember this:
    1. Long/initial fold must be odd-numbered.
    2. Short/following fold must have approximately same degree.
    3. Open up, fold following the short, zigzagged lines.
    4. ???
    5. Profit?

Not sure if useful.

Network performance checklist: TSO/LSO

Took me good few hours to find out why specific combination of task performs incredibly slowly on my server.

For reference, in my case it’s port-forwarded ssh/https connection over openvpn.

[ Client ] --(Internet)--> [ Gateway ] --(OpenVPN)--> [ Server (SSH) ]

Doing anything which takes up bandwidth (displaying log files, etc) will shoot the cpu load (at interrupt) up by a lot. By a lot I mean over 50% of one core.

This guy have the reasoning why it’s happening but I don’t know how much of it is correct. VMware support page also suggesting disabling it if network performance is slow.

In FreeBSD it’s:

echo 'net.inet.tcp.tso=0' >> /etc/sysctl.conf

In Windows it’s this .reg file:

Windows Registry Editor Version 5.00

[HKEY_LOCAL_MACHINE\SYSTEM\CurrentControlSet\Services\Tcpip\Parameters]
"DisableTaskOffload"=dword:00000001

It seems to involve a shell script in Linux so I won’t bother writing it off here since it differs by system.

As usual, YMMV.

…and there goes my time 🙁

PSA: Never trust external X-Forwarded-For

For god knows how long, proxy_set_header X-Forwarded-For $proxy_add_x_forwarded_for; is one of the line usually included in nginx config snippet for proxying to a unicorn (Rails) backend.

…which is something you should never do unless you have another load balancer in front of the nginx being configured.

That line basically tells nginx to append $remote_addr to whatever X-Forwarded-For value currently set. It is only useful when your nginx is behind other load balancer which set up its own (hopefully correctly) X-Forwarded-For. It should be set explicitly to $remote_addr for any external-facing proxy. Otherwise fun things will happen.

FreeBSD pkg (manual) upgrade thingy

For working with locked packages (the ones which must be upgraded through compilation because of using custom options)

#!/bin/sh
# filename: pkg-lock-outdated

pkg query -e '%k = 1' %o | while read pkgorig; do
  pkg version -ovL => -O "$pkgorig"
done

The script above is to list locked packages which need upgrading. And to upgrade everything at once (and sit in front of PC waiting for whole process)

#!/bin/sh

listfile="/tmp/pkgforupgrade.$(date '+%Y%m%d%H%M%S')"
pkg-lock-outdated | cut -f 1 -d '<' > "$listfile"

while read <&3 outdated; do
  pkg unlock "$outdated"
  portmaster "$outdated"
  pkg lock "$outdated"
done 3< "$listfile"

rm -f "$listfile"

There’s another alternative of unlocking all packages at once, run batched portmaster, and lock them all again.

PostgreSQL authentication quick start

Connecting to PostgreSQL from command line can be a bit confusing.

For starter, just like MySQL, psql command defaults to connecting to socket instead of tcp. To make matter confusing, most PostgreSQL installation defaults to ident (also called peer)authentication for socket connection: it basically matches current user’s username (ssh login, etc) with PostgreSQL equivalent.

So, instead of using this to login from root to PostgreSQL superuser (usually named postgres or pgsql):

# psql -U postgres

you do this (assuming sudo installed):

# sudo -u postgres psql

The configuration for this is located in pg_hba.conf of PostgreSQL data (or config in Debian) directory (/etc/postgresql/$version/main in Debian, /usr/local/pgsql/data in FreeBSD, /opt/PostgreSQL/$version/data in EnterpriseDB PostgreSQL).

To switch to password based authentication for all methods just replace ident (or peer) with md5 in respective lines and reload/restart the service. Don’t forget to set password for postgres user first before changing this otherwise you won’t be able to connect. You can then connect using psql to any user using password.

Completely Disable UAC in Windows 8

Windows 8, just like Windows 7, has Control Panel interface to disable UAC. There’s difference though: disabling UAC via Control Panel in Windows 8 doesn’t fully disable UAC. You can check it by launching Command Prompt: in Windows 7, you’ll get administrator command prompt (the signs are “Administrator: Command Prompt” window title and default directory at %WINDIR%System32) while in Windows 8, you’ll get normal command prompt.

Also reported here (complete with “fix”).

Fix by editing registry:

  • Key/Path: HKEY_LOCAL_MACHINESOFTWAREMicrosoftWindowsCurrentVersionPoliciesSystem
  • Name: EnableLUA
  • Value: 0
Note that there isn’t really much reason anymore to completely disable UAC. Well, in my case, this ancient (but useful) tool isn’t quite compatible with UAC.

Rails: read_multi and dalli

Be careful when using read_multi with dalli: it may return nil-valued key instead of the correct key.

The issue is tracked here and thanks to this I dropped the read_multi usage in moebooru and used the much simpler (and most likely slower) single fetch (per entry) instead. There’s alternative way to use it – do a read_multi and refetch whatever missing/nil-keyed but apparently I’m too lazy to do it.

Configuring SHA rounds for password in RHEL5/6

Due to NIH syndrome and Drepper being Drepper, the only remotely secure password hashing algorithm in RHEL5/6 is multi-rounds SHA512. The default is just salted SHA512 which sucks.

Also applies to CentOS, ScientificLinux, and other RHEL clones.

Anyway, to update the default setting, these files need updating:

  • /etc/login.defs: add new line SHA_CRYPT_MIN_ROUNDS 5000
  • /etc/pam.d/system-auth-ac: find line with `password    sufficient    pam_unix.so sha512` and append rounds=5000.

Note that the change to last file may or may not be persistent. I have no idea how to properly set it up.

Finally, run this command: authconfig --updateall.

If you’re using RHEL5, run authconfig --passalgo=sha512 --update first.

Rails 3.2 in Subdirectory

Steps to be into Rails in subdirectory:

Update config.ru to understand the subdirectory mapping:

run Moebooru::Application

change to

map (ENV['RAILS_RELATIVE_URL_ROOT'] || '/') do
  run Moebooru::Application
end

And then start Rails with correct environment variable (example if you use Unicorn):

RAILS_RELATIVE_URL_ROOT='/img' bin/unicorn

And that’s it. No need to mess with routes.rb as I previously thought after searching and experimenting for few hours. Links etc are properly generated with correct prefix. Or at least based on my quick testing.

May or may not work with earlier version(s) as I haven’t bothered to test it anywhere else.

Basic Dovecot/Postfix in Ubuntu

Configuring mail system is annoying. There are quite a bit different components which must be configured to work together.

My main choice for mail system is dovecot/postfix. As I don’t really understand how all this thing goes, I may have missed or misunderstood some parts. Or most of them. Feel free to correct this post.

For starter, most of basic configurations for Postfix and Dovecot has already been done by Ubuntu (or Debian) default configuration which includes enabling IMAP and TLS.

LDA

LDA (or MDA) delivers received mails to correct user and location. I let dovecot handle this thing because it’s easier this way. In /etc/postfix/main.cf:

mailbox_command = /usr/lib/dovecot/dovecot-lda -f "$SENDER" -a "$RECIPIENT"

Source ]

And that’s about it.

Maildir

The Mailbox format. The alternatives are mbox (ancient, shouldn’t be used anymore, I believe), or dbox (Dovecot only), or some other formats (which I don’t really care about). So basically I go with Maildir.

/etc/dovecot/conf.d/10-mail.conf:

mail_location = maildir:~/Maildir

[ Source ]

SASL

The last one, Postfix authentication. I use Dovecot SASL because it’s easier.

/etc/postfix/main.cf:

smtpd_sasl_type = dovecot
smtpd_sasl_path = private/auth
smtpd_sasl_auth_enable = yes
smtpd_recipient_restrictions = permit_mynetworks, permit_sasl_authenticated, reject_unauth_destination

/etc/dovecot/conf.d/10-master.conf:

unix_listener /var/spool/postfix/private/auth {
  mode = 0666
}

[ Source ]

For Dovecot config, it’s usually already in there, one just uncomment it to enable.

Restart Dovecot and Postfix, and that’s it. As I mentioned before, Ubuntu has preconfigured many things which leaves me only few additional tasks to be done to enable simple mail system (with TLS, IMAP, and whatnot).

Protip: use Google Apps or Live Domain instead of managing your own mail server.

Disabling Upstart Service in Ubuntu (11.04+)

Took me few weeks to find out that this one-liner does wonder:

echo manual >> /etc/init/mysql.override

(the line above is to disable mysql, obviously. And must be done as root)

The answer is on first hit (as of this post’s writing) of googling “ubuntu disable service” but you need to scroll down a bit and ignore shitload of crappy, outdated explanations to find that small gem.

Unfortunately doesn’t apply to previous LTS. Or does it?

zpool hourly status check

I’m setting up cron job for a storage server using ZFS. There’s zpool status -x but it returns “all pools are healthy” (or “no pools available”) on no error and prints errors to stdout (instead of stderr), rendering it annoying for cron job.

#!/bin/sh

set -e
set -u

zstatus="`zpool status -x 2>&1`"
case "${zstatus}" in
  "all pools are healthy"|"no pools available")
    return 0
  ;;
  *)
    printf "%sn" "${zstatus}" >&2
    return 1
  ;;
esac

Put it in a file (e.g. /root/bin/zpool-status-cron), make it executable, and add it to crontab.

bcrypt in Debian

WARNING: using method below will lock yourself out when using emergency console since whatever crypt it’s using surely doesn’t understand bcrypt (as I experienced myself). Additionally, this solution won’t add bcrypt support to other applications using crypt interface like proftpd unless it’s started by preloading libxcrypt.so first (also from my own experience).

As much as Drepper want to pretend bcrypt is wrong solution, it actually gives one benefit: ease of switch to Linux. Some systems use bcrypt by default or configurable to use it. On other case, there might be time where you need system’s (or applications using system’s) crypt to handle bcrypt passwords from external system (usually web applications).

It’s quite difficult to enable bcrypt support in RHEL based distro as there is no libxcrypt and pam_unix2 packages available. Thankfully it’s available in Debian (and derivatives) in package libpam-unix2.

The README.Debian says to modify files in /etc/pam.d but if I remember it correctly, it confused apt PAM handling system or whatever. Fast forward few weeks, I discovered a better way to use it by creating PAM configuration in /usr/share/pam-configs. Since it’s mostly equivalent to normal pam_unix, I just copy and modify the file using this (long-ass) oneliner sed:

sed -e 's/pam_unix.so/pam_unix2.so/g;s/^Name: Unix authentication$/Name: Unix2 authentication/;s/pam_unix2.so obscure sha512/pam_unix2.so obscure blowfish rounds=8/;s/ nullok_secure//' /usr/share/pam-configs/unix > /usr/share/pam-configs/unix2

Then execute pam-auth-update, select Unix2 authentication and deselect Unix authentication. Don’t forget to update passwords for all other users as well or they won’t be able to login since pam_unix2 doesn’t recognize sha based hashes.

Actually, change all other users password to use md5 first before replacing the PAM with pam_unix2.

Update 2012-04-01: Removed nullok_secure since it isn’t supported.

Update 2012-06-09: Added warning.

Removing Annoying Speaker Static Noise

I’m not sure which sound cards are exhibiting this problem but at least it is in my system (onboard Realtek HD – Intel DH61BE motherboard running Windows 7 x64). It’s been annoying me since like forever and finally tonight I decided to actually solve the problem.

As it turns out, the solution is quite simple: disable PC Beep channel. A quick google showed this hit quite a bit of people and apparently this is the reason (or at least related).

On related note, apparently I’ve did this before and then completely forgotten. This is why I wrote it this time.